Wednesday, January 30, 2013

This one's LONG overdue!

Sometimes we get very busy with life, or simply life gets busy with us.  Such was the case with my leopard print skirt in this post.  I made it over three years ago, then was involved in a car accident, and this skirt was folded up and put away for a while.  I almost forgot I had it!  I was in no mood nor state of mind to review it three years ago, but that was then and this is now.

Here is my simple, self-drafted leopard print skirt made from a fabric remnant from another project I can't quite remember.  It must have been for my daughter, maybe for Christmas gifts for her friends.


There was a reason I decided to talk about this skirt.  A few weeks ago I pinned an outfit I saw on Pinterest to my Favorite Looks folder.  The girl had on a denim jacket, white tank, and leopard-print skirt, and then I thought to myself, "Hey!  I have all three of those pieces!"  An outfit was born!

Here are some more pics from various angles:


 And I had to include the traditional "hands on hips" pose for PR members.  Ha, ha, ha ;) .


One of the things I really like about this skirt is the peekaboo hemline.  If you look closely at the hem in the pic at the top of this post, you will see the underskirt (made out of Bemberg rayon/lining fabric) is about 2 1/2" (or thereabouts) shorter than the sheer overskirt.  I did that on purpose when I made it, probably because I saw some skirt like that on the Internet.  Both pieces are joined together at the waistline, a casing was added, and some elastic was sandwiched between the two layers.

Simple.  Fast.  Sewing.  No thinking required.  Easy peasy.  Make in the morning, wear it at night kind of skirt.  As for the fabric, I know I purchased the Bemberg online many years ago.  The sheer leopard print fabric was purchased from...Walmart.   Yes, I did say that lol.  Believe it or not, my closest Walmart has some really nice fabric with an large selection of prom fabrics with matching netting.  Definitely not the highest quality by any means, but nice enough to make a decent project.  Like I said, this was leftover material, probably from fashion scarves for my daughter's friends.

Here is a closeup of the rolled hem as well as elastic casing:
 
 Off to work on pattern reviews, and hopefully 2013 will produce more blog writing about my sewing projects than 2011 and 2012.  Cheers, and Happy Sewing!

Monday, November 5, 2012

Lots of New Stuff!

Boring post because there are no pics today.  However, I've been very busy and my machines have been smokin'!  First off, I made a quickie, no-pattern-needed knit top from the Threads website.  I became a Threads Insider last month and have been checking things out here and there and am very interested in reducing my stash.  Thus, my vast knit stash has been reduced by at least yard.  I know, I know, just a yard.  But every little bit helps.

Second, I'm halfway through making a dress for myself from my previous post on my daughter's McCalls black LBD.  She liked it and took it back to college .  It was a little short for me though.  Again, using up some stash yardage of a beautiful blue and black shiny brocade purchased from the first PR Weekend I attended.  About 2007, I think.  

And finally, a quick knit top from my Textile Studio TNT pattern that I have morphed so many different ways.  I used a knit purchased from Kashi at Metro Textiles from PR Weekend last May. 

Pics are coming.  I'm just so busy.  Also working on four pillows for my daughter's two littles in her sorority this semester.  Making two more for my niece (also in the same sorority) that is also taking on two littles.  The pillows will have appliqued greek letters on them and the names possibly embroidered.  I'm still waiting on that directive from my daughter.   I asked my daughter what do you call two littles in the same family line because I've never heard of taking two.  She responded, (a duh on my part) "They're called twins."  How cute!  She also requested two pink, fleece embroidered sorority hats--another stash reducer. 

Must get going.  Lots to do and so little time.

Wednesday, October 24, 2012

McCalls 6460

Let's just say I love this dress!  So much so that I'm going to make one for myself.  I'm modeling the one made for my oldest daughter who always needs something for her sorority functions.  It's her second LBD in that many months.  The first was reviewed a few weeks ago on my blog, McCalls 6111.

My full review of this pattern can be found at PR.  It's a dress that you really want to read all the reviews, google for information before you ever lay a scissors to your fabric.  There are some issues, but none that can't be worked out beforehand.  Doing so will create a beautiful dress with a beautiful fit.  My review includes all the particulars including fit issues I encountered as well as all my alterations. 

Still deciding...do bloggers want to see the full review on blogs?  Some do, some don't, and I haven't been blogging a while so I just decide to keep my full, detailed reviews on PR.  Please let me know.

And now, without further adieu, here is McCalls 6460:

Swing Jacket is a Simplicity Retro pattern, leather purse with custom-made handle was created from the book, Vintage Bags, and a reminder to never arch back for a posterior shot.  My poor satin backed crepe started puddling on me :( .  Otherwise it was looking pretty good.


Tuesday, October 23, 2012

An "Interesting" Discovery

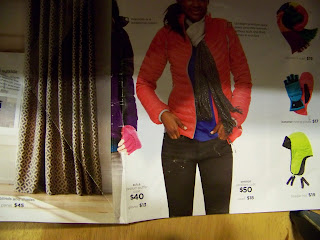
It was interesting to me at first, then a bit disturbing when I was viewing a recent JC Penney ad.  I'm not sure, but I think it might be a case of photo trickery.  So I decided to ask my husband.

Here are two pics from a recent ad.  Look at the models on these two pages.  Yes, three of the four pics are of the same girl.  But look at the thighs.  They look almost identical in all four pics.  All four have that "inner thigh gap" as if thighs should not be touching.  Each picture appears to have an indent about 4" below the crotch line.  Forget trying to slide a manilla folder between their legs, you could slide a 2X4 right through without it every touching their thighs lol!  Very few people I know have thighs like that.  There are some but they are a tiny minority.


Point is, I hate advertising like this.  As if they pants they sell are going to make us normal people look like we have this huge inner thigh gap.  Or like it's even desired.  It's not normal.  Not that it's abnormal, it's just not a mainstream look and most women and teens I know are simply not built this way.  Except for that very small minority.

Now, look at a model from another JC Penney ad.  It was either the same ad or maybe a week or two apart.  This model has realistic hips and thighs.  They are fuller and normal looking.  No, not heavy at all.  Simply normal like the way many of us are built.


Please JC Penney, use young teens in your ads that have thighs built like the majority.  Go for the manilla-folder-could-fit-between-the-thighs look.  Not a stinkin' 2X4.  And if these pics were photoshopped like many are, shame on you.  

Tuesday, September 25, 2012

McCalls 6111

I've been sewing SO much lately, and my blogging has been non existent.  However, I have decided to actually do a blog post on McCalls 6111.  My dress has already been reviewed at Pattern Review so all details have been posted in my review.

I'm just including a few extra pics.  This is a dress for my daughter who needs some black dresses for sorority functions.  I see what she pins on Pinterest on her fashion board, and I thought this little number fit in with styles she likes.  The feature I like the most about this dress is the low back with straps that are knotted into a bow just above the waist.  I used a Slinky knit for the dress (not recommended by the pattern--wovens) and black lace on top of black silk organza for the straps.  It worked out just fine.  This is a bias cut dress so if you normally don't sew bias-cut garments, do a little review homework before making this.  I forgot to do that, but I don't think it mattered.

What I love about this style--it's hip and cute.  What I hate about this style--can't wear a strapless or conventional bra.  Must use those stick on cups or uniboob devices with adhesive. 

Here are several poses of this dress.  My major alteration was to create two, waist tucks extending near the bust apex.  The dress needed shape.  My daughter didn't not want a "bag".  There is PLENTY of ease in this dress.  I didn't make it fitted, just took out some excess as I didn't want to totally change the style.  Just wanted it to look more like the pattern cover photo.


That's it for now!  It's a cute little dress perfect for those pretty young things in the late teen/early 20-something group.

Monday, July 16, 2012

Our Sewing "Assistants"


If you have sewing "helpers"  or "assistants" and have pics of them, I'd sure love to see them!  I've been doing a lot of sewing lately but have yet to post about my projects.  In the meantime, I have a few updated pics of my boys.
 
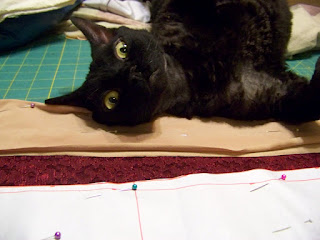
My sewing helpers:  My black Devon especially LOVES helping me sew!   He loves to sit next to my machines or attempt to lie on my fabric while working.  Sometimes my Sphynx joins in on the action, but typically it is my handsome boy, Jake.

If you have pics of sewing helpers, I'd love to see them!  Please post a link as a comment.


Monday, April 2, 2012

A Swimsuit that I Love!


Swimsuit shopping and jeans shopping have two things in common from what I hear from a lot of women I know. You have to try on lots of swimsuits and lots of jeans to find ones that not only fit, but look good.


This past weekend, I hit the jackpot :) ! I made one that I love (forget the countless hours trying them on!):


Right down to the black, slimming side panels,

and ruched neckline piece.

Also with a full-support bra lining to held everything in place just right!

Two years ago I started on my swimsuit endeavor, and last year I finally made my first one that I actually liked which was the same pattern with a blue/brown floral print. Since I've nailed the fit, I decided to work on improving construction on the bra lining, using my serger, and coverstitch machines.


All elastics were inserted via my elastic foot on my Babylock serger. No quartering, no marking, no pins. Just set the screw tension and the foot automatically places and stretches the elastic in place while it is being serged on. What a breeze!


This also presents a question I was asked by a fellow PR member. "What about the front leg opening having a 1:1 ratio of elastic/fabric vs. the back have more elastic tension?" I have read about this being done, but it is not my preference. I like a snug leg opening all the way around. And with the Babylock attaching it, the tension is the same the entire circumference of the leg. This works very well for me. I even do this for my panties. It is not too tight, nor uncomfortable. My guess is it depends on the person and the body. If a person is heavier, a tight front elastic might cut into the flesh uncomfortably; therefore, necessitating that 1:1 ratio on the front. For me, using the elastic foot on my serger produces a great and comfortable fit.


Let's talk topstitching. My coverstitch is da bomb! Used it for all my topstitching but secured the CB seam in the back with my regular machine. That's an area I want to refine the curve in tissue to make for smooth sewing at that spot.


I did a review at PR with loads of pics including step-by-step bra lining instructions/tips. If you would like to read them, you'll have to click on my sidebar and go there or click on this link: My Swimsuit Review . I just haven't had time to transfer all the pics and info to my blog...sorry about that!


If you haven't tried sewing a swimsuit, DO it! Prices for nice suits are outrageous, and making one is easy. The hardest part is doing a couple of test suits to get the fit right. I've done blog posts on that lol--the links to them are in my PR review. Once the fit is good, stitching them up is a breeze and quite cost effective too. And what's really great is picking out the fabric. Pages after pages of nylon/lycra at Spandex World and Spandex House.


So get going! Go to PR, look up swimsuit patterns and reviews, decide on your particular style, and make this YOUR year for the swimsuit that you love!


Happy Sewing!