Wednesday, June 26, 2013

A Talented Teenage Seamstress!

(Note:  Lots of pics in this post :) !)

I've waited a LONG time for this moment.  Far too long.  How I could have given birth to two daughters who expressed no interest in sewing I'll never know.  I tried to get them interested when they were 8 and 10 with sewing lessons at a local shop, and although they did make nice, fleece tops, they didn't get bitten by the sewing bug. 

I was a virtual pariah to them in middle school and high school.  It wasn't until my oldest daughter's Junior prom that I suddenly became a little important.  Gradually, I started become more and more important to the point where they actually wanted me to make knockoffs of clothes they pinned to their Pinterest boards.  I happily obliged.  The only problem was their requests went from nothing to everything in what seemed like overnight.

This summer my younger daughter arrived home from college and was doing a lot of sitting around on her laptop (looking at Pinterest of course) when she wasn't working.  I told her she could get a lot more accomplished if she actually made some of the clothes she was dreaming about.  In fact, she replied, "That's what I have you for."  ;) .  So it took me by surprise (that's actually an understatement) when she announced a few days later that she wanted to sew some tops for herself because I'm "too slow" lol.  If only there was nothing for me to do all day except hang out in my sewing studio, right?  If only I had a maid...

Let me tell you, she is a fine, young seamstress!  She is ambitious, easy to teach, and never was intimidated by a sewing machine.  Perhaps it was her early training as an 8-year old or maybe always seeing me at my machine.  Could be a little of both.  She had tons of ideas, looked at fabrics she wanted, and she drew out sketches as per my request of each top that was in her head along with the type of fabric being used.  She logged hours looking at fabric (a girl after my own heart :) ) and filled the website shopping cart. 

Here are all the tops she has made as well as her first getting-acquainted-with-the-machine projects. She created custom Greek letters in her choice of fabric, adhered them to the RTW tees with Heat N Bond, then zigzagged around the perimeter of the letters: 

 (My apology for these not being in order.  Blogger was being very uncooperative with picture placement.)

2nd tank where she learned about stretch %

1st tank with front darts for a better fit
5th tank with front V-neck that is hard to see.


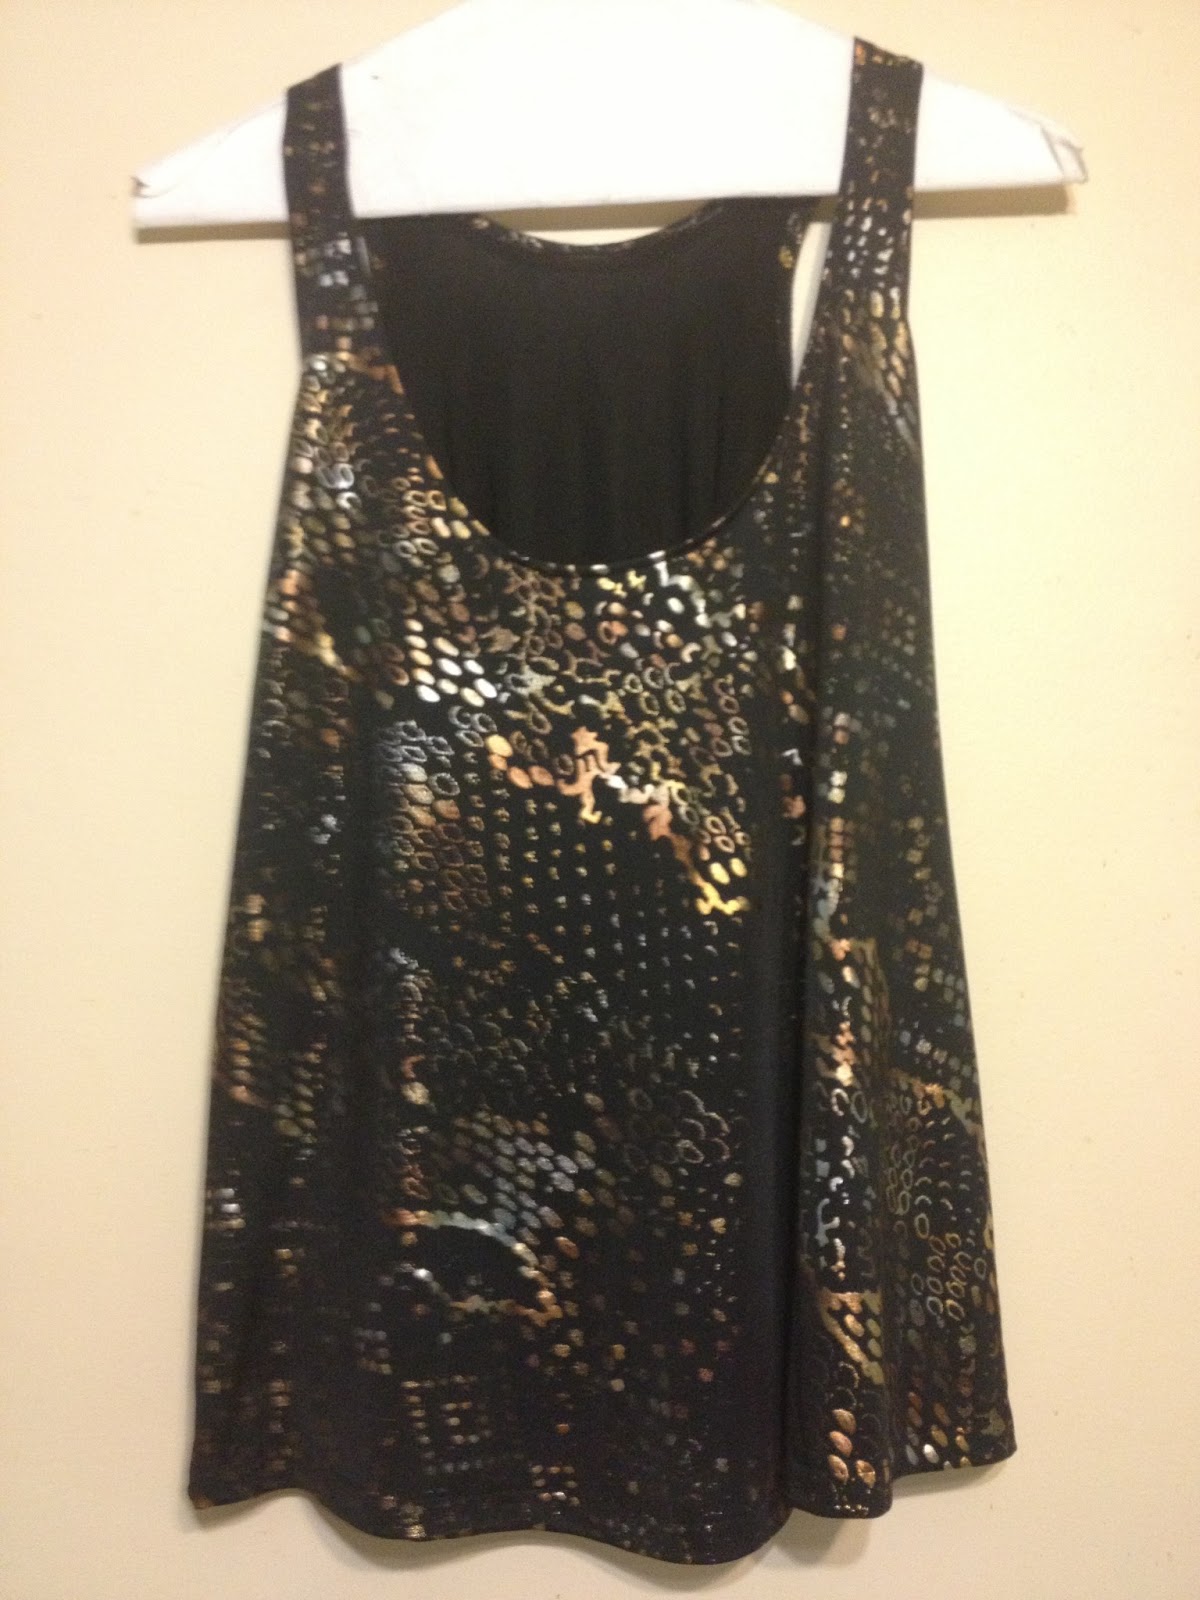
4th tank with back darts for improved fit
3rd tank in lace w/ FOE and serged rolled hem.
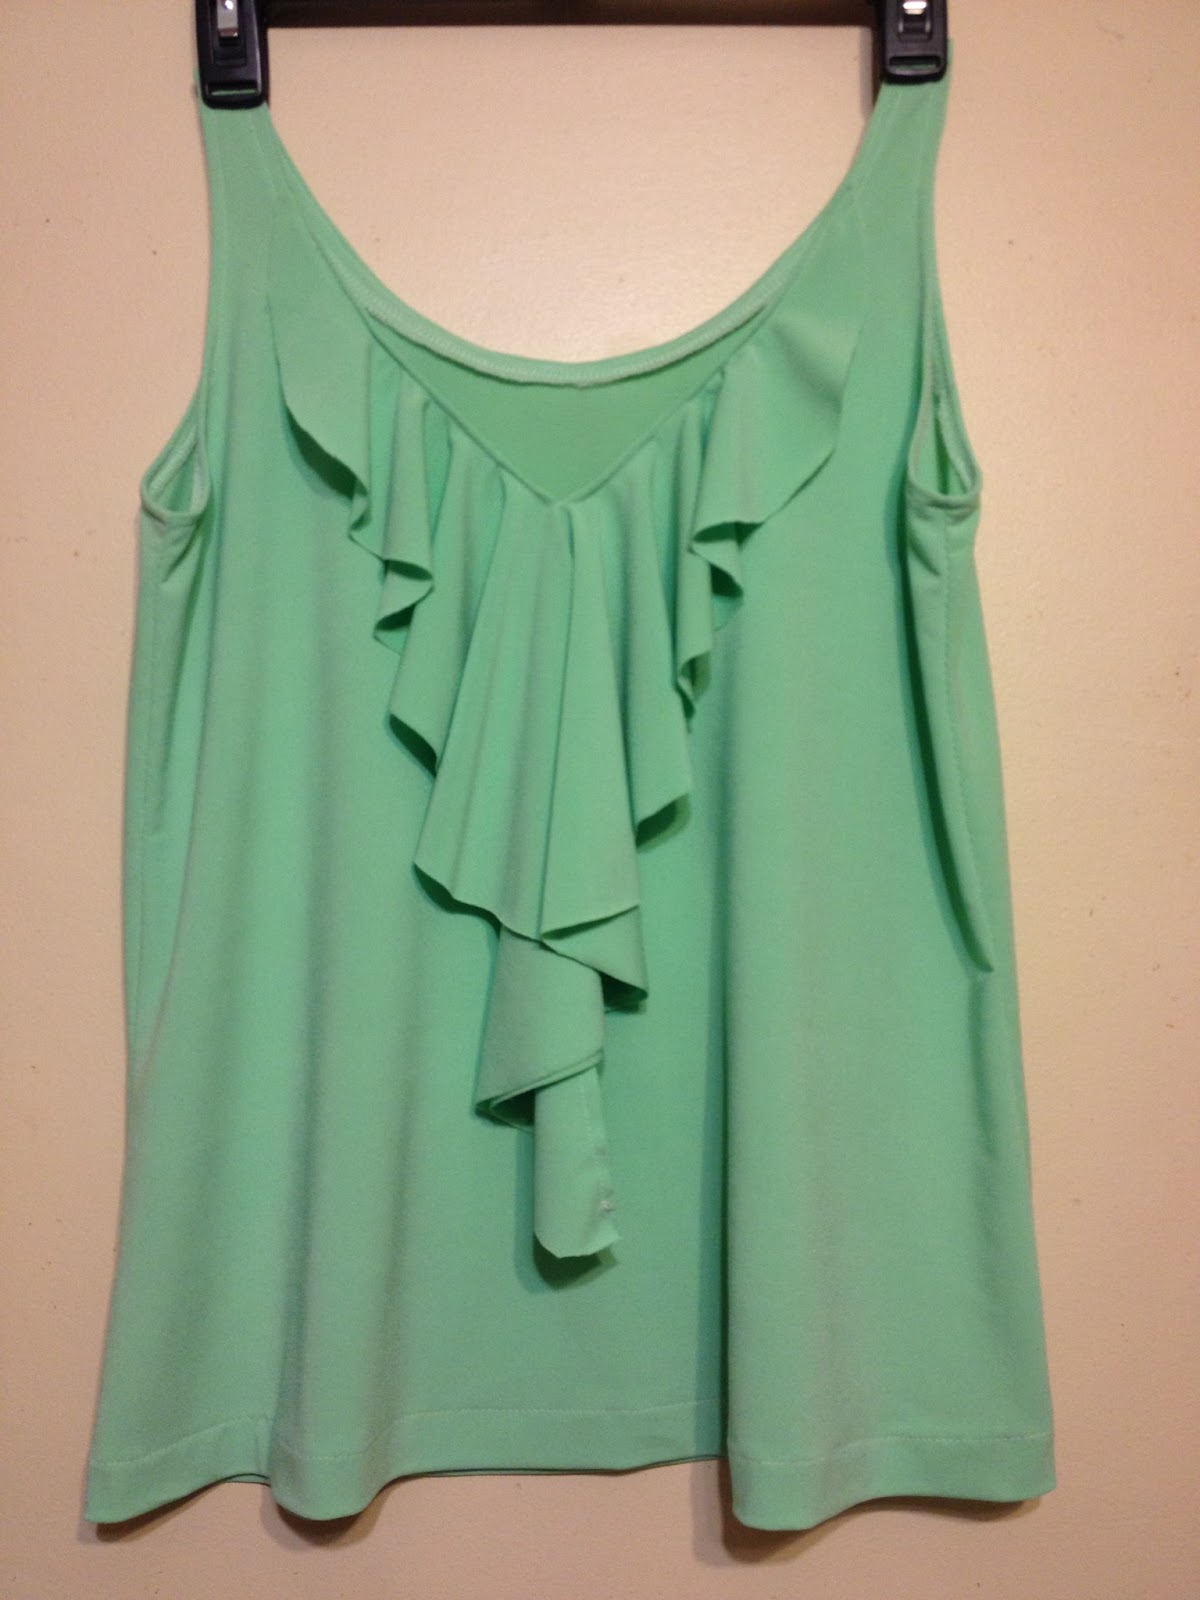
6th tank, her best one yet with custom flounce.

1st Greek Tee


5th Greek tee
 
2nd Greek tee
Her Luck-of-the-Irish 4th Greek tee

3rd Greek tee.  We both love the leopard print fabric.


We decided to use the Jamie Christina Mission Maxi pattern as the basis for most of the tops.  She tried on the Maxi top I made for myself and liked it but wanted it to be a looser, flowy fit at the bottom.  I performed the necessary pattern modification and voila!  Her pattern was born.  She has learned so many things including:
  • Selecting knit fabric types like rayon, cotton/lycra, stretch and non-stretch lace along with appropriate needles
  • How to use the rotary cutter and mat and make markings
  • Review of fabric selvedge edges and importance of grainline or rib alignment
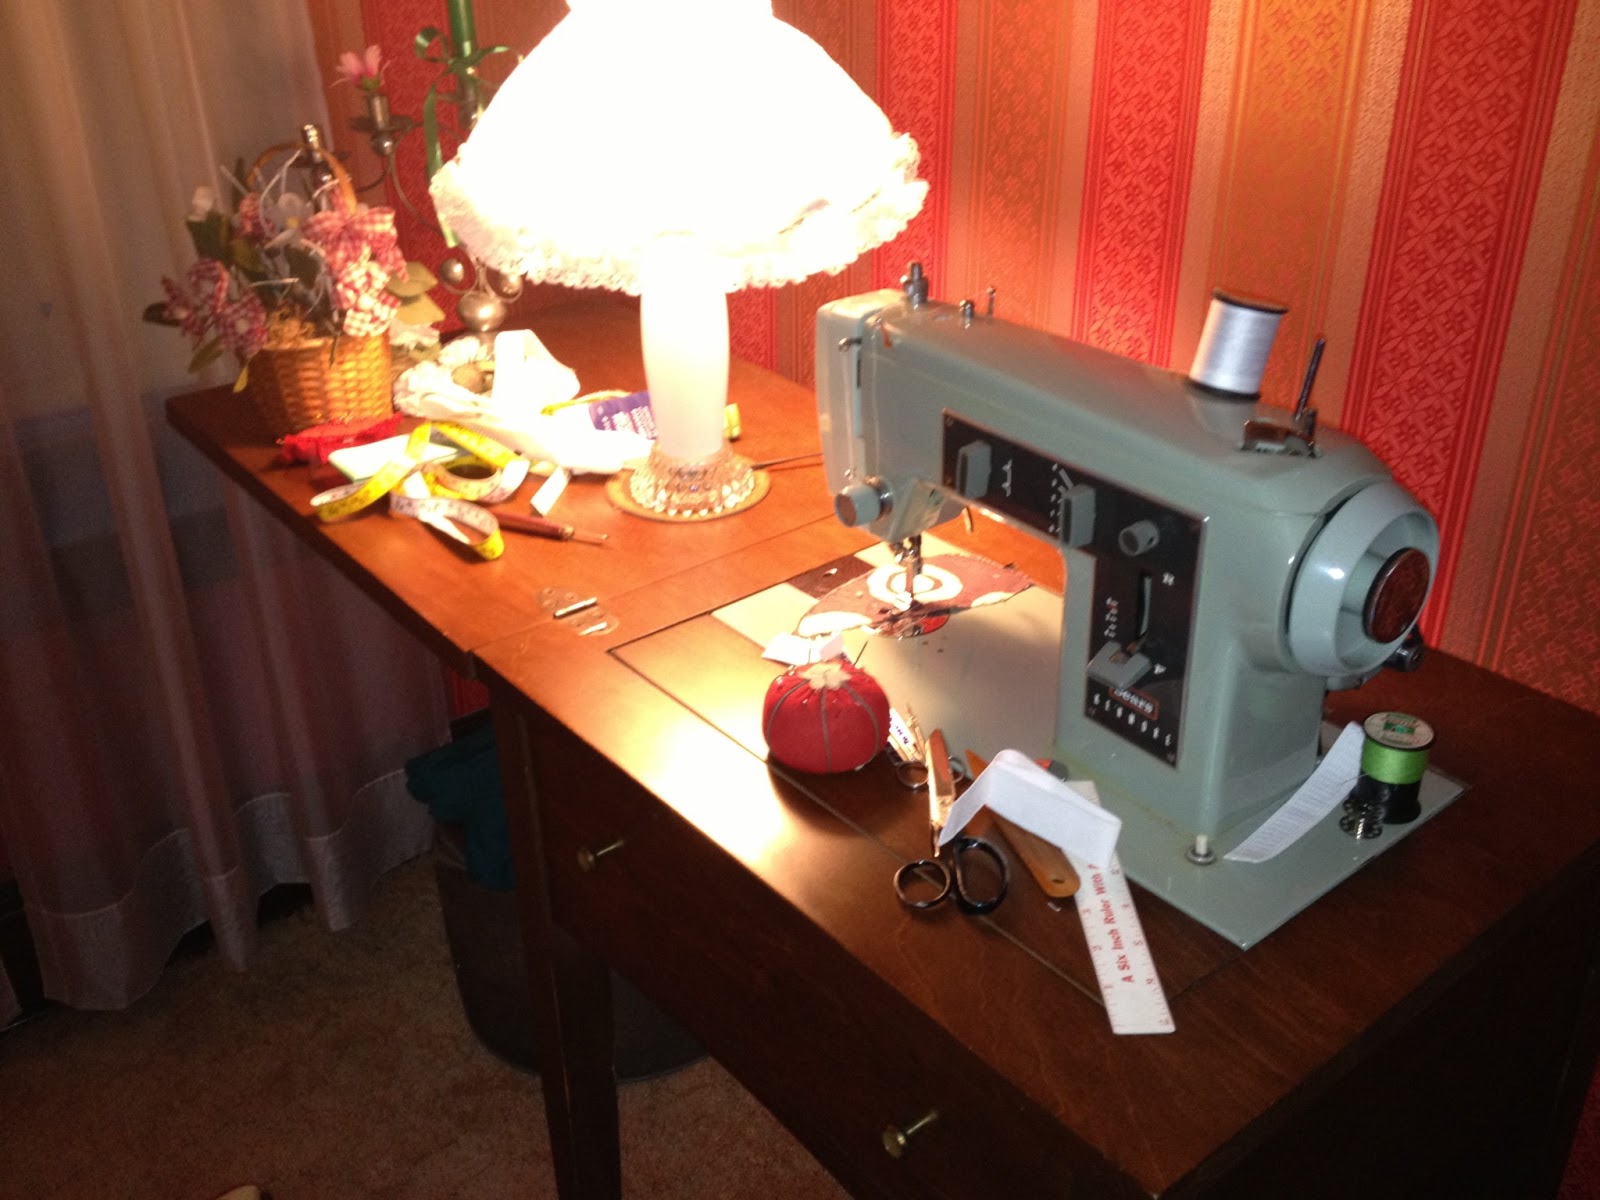
  • How to utilize the features of a top-of-the-line sewing machine
  • How to utilize a serger and a coverstitch machine.  (She's still not a fan of the coverstitch because it stitches too fast for her.)
  • Importance and use of the seam ripper, hem gauge, chaco pencil, tracing paper/tracing wheel
  • Seam finishes like a narrow hem, rolled edge, turn and topstitch, FOE
  • Pattern modifications for blocking and patternmaking design to make a flounce, adding circular fullness, lengthening, and designing a second back pattern for a choice of racerback and regular tank style.
  • Staystitching, basting, and reinforcing a point
  • How to stitch darts both fisheye and open-ended
  • Determining different stretch percentages of knits and how it affects fit
What hasn't she done?  Learn how to properly read a pattern!  I'm not worried about this at all.  By the time we actually choose a Big 4 pattern to use, the directions will seem like a piece of cake and just a rehash of all the info she is learning.  In addition, she is learning how to sew with knits right from the start.  What I will never understand is how some people fear knits.  She doesn't understand this either.  Knits have certain challenges, but they're much like wovens in that you need a particular needle, a walking foot helps, and having a straight stitch plate (like my Elna does) really, REALLY helps.  The straight stitch plate is da bomb because it prevents flimsy fabric from being gobbled up under the needle plate. 

Yes, she does have it made.  One-on-one tutoring by me.  I'm there for every problem, every question, and explain the ins/outs, why's/how's of every technique she is learning.  But she brings some very special qualities to the sewing table:  ambition, motivation, good planning and follow through.  She "says" she doesn't really like to sew, it's just that she needs, or rather wants, clothes.  However, she seems to be taking a decent number of pics of the tops she is making and sending the pics to her friends.  She accidentally left her phone by my machine last night, and her friend responded back with an enthusiastic comment about her most recent top.  Why she doesn't want to admit it, I don't know.  I guess that would mean that Mom is right--sewing is fun!  And we certainly wouldn't want anyone that think that Mom is (GASP!) right.  That is so uncool.  I laughed at her when she said she would stop sewing if I posted a pic of her on my FB page.  I did anyway, but only of her hands creating her flounce pattern lol. 

Anyway, I am a very proud mom! So proud that at times I feel like I'm ready to burst.  It has been a long time waiting for a sewing seed to sprout, and it not only has sprouted but is growing at a fast and furious rate.  In fact, she wants to go fabric shopping in NYC next month.  How cool is that?

So, I leave you with hope.  Hope that our favorite young ladies who say the never want to sew may some day change their minds.  We have planted the seeds, and over time some may take root and blossom into a young generation of fine seamstresses.  We can only hope, but it takes time and planning.  "Sew" your seeds carefully and nurture with encouragement and a positive attitude toward the art of sewing.


My Pride and Joy. Thanks, Annie!

Years ago (more like 3 decades+) back in the summer of 1980, I asked my grandmother if I could have her old Singer when she stopped sewing.  She laughed and said she had many more years of sewing ahead of her, but if and when she stopped she would give her machine to me.  She didn't have as many years as she thought.  Alzheimer's gradually robbed her of her impressive sewing ability, and that same disease robbed me of that old Singer which my grandmother gave away not remembering her promise to me.  It was more than a machine to me, it was a family legacy, and it hurt that it just "disappeared".  I remember asking her about it sometime in the mid/late 80's, and it felt like a gut punch when she said, "I don't sew anymore.  I gave away my machine."  It's tough.  You can't be mad at someone with Alzheimer's, but I sure was mad at that disease.

Kenmore Model 33, exactly as my aunt left it during her last project.
Fast forward to 2013.  My great aunt is having some serious health issues. My dad works hard at making sure all her things are taken care of like bills, her house, medical stuff, etc.  He puts in so many hours of work and travel and each one of us kids has gone to visit her at least once since her health decline.  She's not local, so it can be hard to plan out days for visiting.

Anyway, during my visit to see her my dad and I stayed at her house.  Of course you know I'm going to check out her sewing machine.  It was bittersweet.  Her machine was covered with plastic, but still set up on the most recent project she was working on.  She was replacing the elastic in a pair of pajama pants.  The new elastic was pinned to the waistline, the seam ripper still in place, machine threaded...it was frozen in time.  A Kenmore 33 purchased in 1967 that she will never use again.

Kenmore Model 33, Manufacturing date:  1967
I felt the cold, smooth metal.  Lovingly ran my hands around the top and down the side to the handwheel, and down to the on/off button.  At first I didn't want to move anything, just savor the moment.  Then I picked things up and looked at them.  Her tomato pin cushion, wooden point turner, seam ripper, hem gauge, among other things.  I stitched a few stitches on her sample, looked in her basket, and opened a few drawers to look for accessories.


Annie's wooden point turner
 
Accessory Attachments and Manuals for Kenmore Model 33
I found a box of "gems" in one of her drawers.  An accessory box from 1968.  Price still on the receipt at $5.99 for the following all-metal beauties:

Buttonholer Attachment for Kenmore Model 33
I really thought that was it, and it was thrilling.  However, the next day produced another present--a buttonholer for the Kenmore 33 also purchased around 1968 with the $9.99 receipt still attached to it.  Honestly, I don't know if she used her accessories that much.  They looked brand new and in great condition.  These little beauties were all metal, some fairly heavy given their size.  My dad asked if I wanted to take the machine home.  Are you kidding me???  Of course!  I would give the machine a wonderful, loving home :) .  Although getting that heavyweight machine in and out of her house and into the car was another story lol.  Those old machines weigh a ton, are sturdy as heck, and just don't die.  I think they'd rust out before wearing out.

Metal Buttonhole Templates for Buttonhole Attachment.
When I got it home, I immediately took my machine to the "spa" where the tech gave it a great tuneup.  It now purrs like a kitten, stitches beautifully, and will be once again lovingly and properly cared for.  And the best part?  It's a family heirloom for me.  That legacy machine that I never got?  Well, now I'm happy because I did get a legacy machine.  My great aunt was a fab seamstress just like my grandmother.  Every time I use my "new" Kenmore 33, I'll think of her and thank her.


Annie in her heyday.  Christmas in FL, 1952.


Saturday, June 22, 2013

McCalls 6460, Version 2.0

If you read my blog (and God love you if you do because my following is near zero lol), you will remember this blog post about my first version of McCalls 6460 for my oldest daughter.  Let me tell you, I LOVE this dress, but her version was a bit on the short side for me.  So I set about making the same dress for myself with some fabric in my stash.  (More specifics on the pattern itself, my issues with design and construction, and specific fitting alterations can be found at the blog link above.)

Here is McCalls 6460, Version 2.0 for me, dear old mom:

The main dress fabric was a beautiful blue/black mystery fiber fabric that I picked up in NYC during Pattern Review Weekend 2007.  I have fond memories of that first PR Weekend trip meeting many new sewing friends for the first time in "real life" as opposed to hanging out in cyberland.  There must have been 2-3 yards of the fabric in my stash so there is plenty more for a fancy skirt or jacket, and it's possible to use the reverse side as well.  It's just as pretty, but definitely a different look.

The top part of the dress (fabric from shoulders to upper bust) was made with um...a sheer from Walmart. lol.  Sometimes it's really hard picking out the right fabric from the Internet, and on a trip to Walmart to pick up household stuff, I checked out the sewing department and found this fabric which was suitable for my dress.  The feel and shimmery look was spot on for the dress, although it's not an easy fabric to work with (think chiffon regarding difficulty).  Flimsy, flimsy, and it frayed like mad so I had to work fast. 

Again, one of the issues I faced on the back was how to handle the zipper, which was by omitting it entirely (on the upper bodice piece) and using a hook and eye.  More details on that can be found about that in my first version from the blog post link in my first paragraph of this review.

On this version for me, I took out an additional inch in CB length in the upper bodice of the flat pattern.  My daughter is shaped a little differently than me in the upper back so I tweaked a copy of the pattern to fit me.  This involved making a horizontal slash in the upper bodice pattern on the back piece from CB to mid armhole.  I overlapped the CB by an inch tapering to 0 at the side seam.  This improved the fit tremendously on me. 

I handpicked the center zip and added hot-fix crystals in the front main dress bodice piece where the seamline meets the upper bodice piece.  My preference was for a little sparkly bling (shown in the photo below) which would shine in the low-light of the Advent dinner that I was attending last December. 

The upper bodice piece edging was trimmed with some satin mystery fabric in my stash.  Perhaps it was the leftover fabric from my daughter's dress?  I don't know--it's been well over 7 months since making this dress.

Anyway, I leave you with at least one crazy lady pic from my dreaded photo shoots lol.  I'm a real jeans and t-shirt gal when I'm at home futzing around doing various sewing and woodworking projects as well as cleaning so photo shoots are always a big drain on my time and so NOT me.  I don't know how models do it. 

Anyway, I hope to update you with my second woodworking project soon--a sewing/craft table cut, constructed, sanded, painted, and polyurethaned all by my myself!  I'm really proud of it and am excited to share it on my blog.  It's a great addition to my kitchen and allows me to have a little sewing corner in the hub of my house.  Also, I've started a post on a new addition, my lovely little Kenmore Model 33 (manufactured in 1967) that I inherited from my great aunt, all with great accessories and in mint condition.  I'm very excited to share that post with you too.  And if I'm lucky and get enough time, I'll actually write the article that is in my head to submit to either Sew News or Threads. 

As always, sew much to do, sew little time!  Happy Sewing!!!

Wednesday, June 12, 2013

Beat 'em to it!

I'm sure there are many seamstresses out there like me who are one or two seasons behind the times fashion wise.  I never seem to make things when the pattern just comes out, it's always much later :( . 

However, my 19- and 21-year old daughters have been keeping me VERY busy this year.  They can't seem to see beyond many of the pattern styles and instead opt for looking at Internet pics and saying, "Mom!  Make me this, will you?"  Who am I to shy away from a challenge!  I've made some nice knockoffs this past spring which I have yet to review, but I present you today with a design that I sketched up and made into a dress specifically for my oldest daughter.  Here's the kicker:  the day after I finished, I saw a similar dress pop up on the Bebe website.  Ha!  I like to think I beat 'em to it :) .  For once I was not only on time, my creation was early.  At least it felt like it was.

Here is the dress:

Shown are a few front versions, followed by the back.  I sketched out this design on paper, then went about deciding how to create it.  For the upper bodice, I used Textile Studio's Santa Monica Tee pattern.  I LOVE that pattern.  Can't begin to tell you how many times I've used it for close-fitting tees, then modified the pattern into looser fit fleece tops, made some short-sleeve tees, used part of it for a dress a few years ago, and now used the upper part of the front and back of the pattern for the top of the dress.  I added princess seams on the front and back to create a molded-to-the-body look.  The black fabric used was a stretchy rayon knit, source...can't remember for sure.  Could be www.fabric.com.

The midriff band was self-drafted to fit using stretch lace in the front and a solid knit band in the back.  Originally I planned on installing a zip, but the knit that I used (think it was a stretchy rayon one), had enough stretch along with beautiful drape.  So I skipped the zip and molded the CB seam to fit.

The skirt was basically two rectangles joined at the side seams, gathered at the top and attached to the midriff band.  Easy peasy. 

 
The end result?  A style I thought my oldest daughter would like because she was the intended recipient of this dress.  She was really happy with the dress, although I have yet to obtain a pic of her in it.  I thought I had made it short enough for her young adult self, but nooooo!  Those pretty young things like their dresses shorter than short.  I ended up taking another 3" off the hemline if you can believe it.   I was thrilled she was happy with the dress.  That age group is tough to please, and few patterns have the styles she and her friends love.  I'm constantly drafting, morphing, combining patterns...whatever it takes to get the styles both my daughters like.  Let me tell you, it has been an incredibly busy spring making them RTW knockoffs.

I've been seeing a lot of color pops with shoes lately too.  So I paired my red heels with the black dress.  My handbag is handmade from leather which was purchased in NYC at Leather, Suede Skins.  It's a beautiful red, alligator patterned leather, with my handmade beaded handle, and handmade fabric flowers.  The pattern for the bag came from Emma Brennan's book, "Making Vintage Bags."  It's a terrific book with lots of interesting bag styles, and I highly recommend it.

I leave you with a pick of the back.  Really, it would have been my preference to keep this dress.  It's a great LBD for a special occasion that is figure flattering with enough stretch for a glass of wine and a good meal :) .  Even one of my plus-sized friends remarked she loved the style and thought it would be flattering for plus-sized women as well.

Overall?  A successful project that went to a good home.  I hope my daughter enjoys the dress and finds it to be a useful garment in her wardrobe. 

Till next time, Happy Sewing!  :)

Friday, March 1, 2013

PR Contest Entry: The Kardashian Knockoff dress

Last week at this time, I had just received two of the necessary fabrics in the mail to make my contest entry.  Saturday I retraced my self-drafted pattern from my red knit dress, and on Sunday I drew new style lines as per the Sears Kardashian dress style.  Monday and Tuesday were spent sewing, Wednesday was finishing details, and Thursday was the photo shoot, writing the review, and entering the review in the contest.  Whew!!!

Here is the result of a whirlwind last four days!

The original style I was copying is at left from the Kardashian dress line at Sears with my Knockoff version at right:


It's a fairly close copy.  My pattern was self-drafted.  I made modifications to the self-drafted pattern I used in my red lace knit dress from a couple of posts ago.

The red lace dress had vertical princess seamlines.  This RTW Knockoff also has vertical seamlines, but they're curvy ones as opposed to being straight.

My bra cups were self drafted from a RTW foam bra.  A seamed bra would have been easier to draft a pattern from, however, I don't own any seamed bra because I just don't like it when the seam shows through tops.  I used a Wonder Bra (I think I own at least 8 of the same style lol) with foam cups to create a paper pattern for the bra cups.  It's not an easy task, but it's not hard either.  In a month or two I will explain how I went about drafting the bra cups and the dress.  It is a process I think any Advanced Beginner sewer can tackle.


Here are a few more pics of the front:


Can't forget the back now, can I?


A few things about the dress and I have mentioned this in my review for the contest.  All of them are likes, and I have no dislikes about my dress.

1.  The design has been engineered for a 40+ body instead of a 20-something one.  What does this mean?  It's all in the details, my dears!  See how the original dress has round bra cups?  I could have made mine just like that, but I chose to draft my bra cups to come up high to the arm crease.  Trust me, it just looks better on an older body and many of my 40+ sisters will know exactly what I'm talking about :).  Even though I'm a gym rat and Eat Clean fanatic, there are some things that we just have to accept and lipo is not my thing.

2.  This relates to No. 1.  When I'm wearing a dress like this, I don't want to have to wear a bra.  Finding a bra that works with a style like this is just too darn hard.  Either the straps won't be placed right in the back, they'll slip and be seen at the front or shoulder, or the front bridge of the bra is too high for the low V of the dress.  I engineered the dress to be snug, the bra cups giving me support, good coverage, and lift just like my original Wonder Bras.  In addition, when I made the cups I used black spacer which can be purchased from Spandex House in NYC.  Two layers of spacer were used for each cup because I felt this was more in line with the thickness of a Wonder Bra with the spacer being covered with fashion fabric.

3.  Ahhh...I love my centered zip!  I loathe invisible zips on snug/close-fitting garments.  They just don't work.  I have two daughters that can break a RTW invisible zip in record time, and they've done just that.  I HATE redoing broken zippers and can't understand why so many manufacturers use invisible zips.  Let's just say they haven't met my daughters.  I'm betting that if every female returned garments to stores that had broken invisible zips, maybe more centered zips would be used.  That's my theory and I'm sticking to it!  :)

4.  My fabric.  I love the blue leopard print.  I can't remember exactly where I purchased it (either Spandex House, Spandex World, or Fabric.com), but I love it.  The black panels are cotton lycra purchased from Spandex House in NYC.  It's a nice weight, not beefy, not thin, just right.

 5.  Let's talk cost.  Could I have afforded the original which is on sale at $59 on the Sears website?  Of course!  But that's not the point.  I wanted that dress, but I wanted a fit that molded to my figure, not to the 21-year old fit model.  Would an off-the-rack garment fit me just as well?  No.  Maybe the bra cups would gape, I'm sure there would be a few things I could pick out that wouldn't fit me just right.  My version gives me a custom fit at a rock bottom price of $12-$15 and that includes the thread and zipper in addition to the material.  I actually have enough material to make a second, identical dress.

Which leads me to another question my hubby asked me:  "Why don't you just buy the dress?  It's only $60!"  Well, what fun would that be?!?!  We garment sewers like the challenge of recreating RTW that fits like a glove.  It's a tremendously rewarding, nerdy activity to be able to construct a self-drafted pattern to one's measurements, pick out fave fabric combos, tweak fit in fabric, and produce a result that would fit better than RTW and flatter a body of my age group. 

Believe it or not, the hardest part of making this dress was tweaking the fit with curvy seamlines that intersect with other seamlines.  Also, I work with 1" seam allowances to be able to easily tweak the fit, and the seam allowances would get in the way of the seams with all this flopping around of seam allowances on the inside of the dress.  Frequently I had to double and triple check to make sure I was adjusting the correct seamline lol.  The seam allowances were eventually trimmed down, but it was a little bit of a challenge at times during the fitting process.

So there you go!  My RTW Knockoff entry for the PR Contest.  I now understand why this contest is a fave among several PR members.  The entries are so good that it raises the bar for sewing, fit, and style.  When that happens, it pushes us to do our best work and be able to showcase our efforts.  The contest gallery does not disappoint!  I am amazed at the beautiful knockoffs created by very talented seamstresses.  Would I like to win?  Absolutely :) !!!  However, every contest entry is a winner because of how high the bar has been set high for this contest.  Every entrant rose to the occasion and produced awesome garments, and I'm still in awe of the amazing work.  I thank every entrant who made me work hard to produce a garment worthy of entering into this contest.  Hats off to this incredible crew!


Monday, February 25, 2013

It's Official!

RTW/Designer Knockoff Contest

I've entered!  :)

Will I finish on time?  We'll see.  3. More. Days....

BTW, I found a great link on Geni's blog.  It's for the Fabulous 40+ group.  And what a group we are!  :)

Saturday, February 23, 2013

Hey Kardashian sisters...

I'm not fattening your wallet, but I'm keeping mine well padded!  I love some of the dresses in your Sears Kardashian line, but I'm NOT going to pay for them :) .

Instead, I created a knockoff dress in virtually the same style in a beautiful red lace on nude stretch lining.  See here:

And you know what?  It fits better than any garment I could purchase off the rack.  When I saw it in the store last May, the cost of the dress was about $60 or $70 on sale.  That's certainly not going to break my budget, but my inner snotty seamstress said, "I can make that same style, and make it better!"  It fits me to a tee and molds to MY curves.  Not the curves of the standard fit model for the K-line of Sears dresses.  Total price of my dress?  Let's see.  Stretch lace and stretch lining were purchased from Spandex House in NYC.  The amount of fabric used for the dress is about $20.  Thread and zipper?  About $4.  Total cost is $24.  My next version will be about $14 due to some drafting changes.


Here are back and side views:

Believe it or not, this was a "proof" garment.  I hesitate to use the term muslin or test garment because those evoke images or a mindset of a garment not meant to be worn except for fitting purposes.  Therefore, I call it a proof.  I drafted the garment to my exact measurements, felt pretty sure I got it right, then went about creating the dress to prove it fit, and subsequently created my "proof" garment.


Here are a few other views.  


And last but not least, a few movement pics.  Let's be realistic.  Movement produces a bit of wrinkles in a fitted garment.  This one is no exception.  The pics give an accurate view of how the dress is worn in real-world situation.  So yes, if you sit down and then stand up, you will have to re-adjust the dress.


I started this dress last May.  I created the pattern, and let it sit.  I sewed a little in June, then in July with bits of time I had available to me during the summer.  One of the things that took a while was handstitching the stretch lace to the stretch lining which served as the underlining.  There are 10 vertical seams on the dress so this process was not exactly what I would dub speedy.  I must have stitched up the dress at the end of the July because I referenced back to this post  about my feline sewing assistants and was still doing the tedious handstitching at that point.  From that point on it sat in my sewing cart as a UFO until I pulled it out in January resolving to get it done.

My dress was self drafted, and I did not use any commercial pattern for the design.  At this time, I'm not going to post how it was drafted because I want to test it out a few more times.  Right now I'm reworking the pattern and taking lots of pics to illustrate some of the steps.  I guess the best way to test it out is to use another body and draft the pattern based on those measurements.  I know my own body so it's easy.  Working it out on someone else's, maybe a few other bodies, is a good pattern proof.

But as for this dress, my first "proof" of a self-drafted pattern, I think it was a success.  It fits, it's flattering, and it's exactly what I envisioned it to be.  And I think my daughter is eager to get her hands on this dress for one of her college events.  I know there will be quite a few more versions yet to be made from this pattern.